What is the Easiest Way to Create Ombre Lips for Beginners?
The easiest way to create ombre lips is by selecting two complementary lip shades—a darker one for the outer edge and a lighter one for the center—and blending them carefully to achieve a smooth gradient. This soft transition between tones is what gives ombre lips their seductive dimension and professional finish.
- Primary Goal: Achieve a seamless lip gradient.
- Key Tools: Two lip shades, lip brush or sponge tip, and concealer.
- Time Needed: Around 10 minutes for beginners.
- Difficulty Level: Easy to moderate with practice.
Introduction to Ombre Lips
Ever wondered how beauty influencers get those mesmerizing, soft-faded lips that look like art? That’s the power of the ombre lip technique, a trend that blends sophistication and creative expression. While it might look intimidating at first—like a runway-only look—this beginner ombre tutorial makes it surprisingly achievable. Whether you’re prepping for your first date night glam or adding flair to your daily makeup, mastering the ombre lip has never been easier.
At its core, the ombre lip enhances dimension, contrasts, and poutiness, all by blending two or more lip colors into a gradient. And no, you don’t need professional-grade skills to get started. With the right ombre lip products and guidance, anyone can turn their lips into a canvas of color.
Choosing the Right Lip Colors
Before we apply anything, let’s talk tones: the difference between a flawless ombre and a muddied mess often lies in choosing the right lip colors for ombre lips. The basic principle? Contrast with cohesion. You want your shades distinct—but not clashing.
Image Prompt Section

How to Choose Lip Colors for Ombre Lips:
- Classic Contrast: Dark red outer with a vibrant orange or fuchsia center.
- Natural Nude Blend: Brown-toned liner and a beige or rose center.
- Playful Pastels: Lavender edge with lilac or baby pink center for artistic looks.
Match to Skin Tone:
| Skin Tone | Dark Shade | Light Shade |
|---|---|---|
| Fair | Rosewood, Soft Red | Peachy Pink, Nude |
| Medium | Berry, Brick | Coral, Mauve |
| Deep | Plum, Chocolate | Caramel, Chestnut |
Step-by-Step Tutorial for Ombre Lips
This easy ombre lip tutorial is crafted to make even total lipstick rookies feel like pros. Follow these steps and get ready to transform your lips into a dimensional masterpiece using the best ombre lip products.
- Prep Your Lips: Use a gentle scrub or toothbrush to exfoliate. Moisturize with a non-oily balm and blot dry.
- Apply Concealer: Lightly tap concealer around your lips to create a blank canvas and sharpen edges later.
- Line Your Lips: Use a lip liner (or lipstick applied with a brush) in your darkest shade. Trace and fill in the corners, leaving the center blank.
- Blend Inward: With a lip brush or finger, blend the edges slightly inward to soften harsh lines.
- Add the Light Shade: Tap or brush the lighter shade onto the center of your lips.
- Blend the Center: Use a dab-and-slide motion with your finger or brush to blur the transition.
- Set and Finish: Lightly blot with tissue. Use translucent powder through tissue if you want a matte effect.
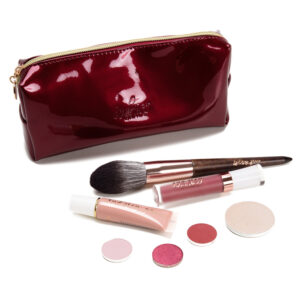
Recommended Ombre Lip Products
Selecting the right formula is just as important as color when creating ombre lips. The ombre lip products you use can make or break your final look. Here’s what to look out for:
Best Types of Ombre Lip Products:
- Creamy Lipsticks: Easy to blend; perfect for this beginner ombre tutorial.
- Liquid Lipsticks: Longer-lasting but require fast blending.
- Matte Pencils: Great for detailed edges and layering.
Stick with pigmented, blendable textures and skip ultra-glossy finishes as they can smear the fade too easily in your ombre lip tutorial.
Cost Guide: How Much Does an Ombre Lip Kit Cost?
Creating ombre lips doesn’t have to drain your wallet. Here’s a breakdown of what a basic ombre lip kit might cost depending on your budget level.
| Price Tier | What You Get | Approx. Price |
|---|---|---|
| Low-end | 2 lipsticks + lip brush | $5 – $15 |
| Mid-range | 2 lipsticks + liner + brush | $20 – $40 |
| High-end | Full kit with primer, brush, liner, duo lipsticks | $50+ |
Expert Tips for Perfecting the Ombre Look

Want your ombre lips to look red carpet-ready, even for everyday wear? These expert tips will help you avoid rookie mistakes and refine your easy ombre lip tutorial technique:
- Use Your Ring Finger: For the softest center blending, your fingertip works better than brushes.
- Avoid Sharp Edges: Harsh edges can ruin the soft fade effect. Always blend the borders when choosing lip colors for ombre lips.
- Layer Slowly: Apply color in thin layers and build for best results.
- Correct Mistakes: Got too much darkness? Dab concealer in the center and reapply your light shade.
- Add Highlight: A touch of highlighter on your cupid’s bow lifts the whole look.
Final Thought
Mastering the ombre lip tutorial isn’t just a makeup skill—it’s a personal style statement. With patience, practice, and the right ombre lip products, you can turn a basic lipstick routine into a vibrant expression of your personality. Whether your vibe is bold and editorial, or soft and romantic, give yourself permission to try, experiment, and most importantly—blend fearlessly with these lip colors for ombre lips.
Frequently Asked Questions
What lip colors work best for ombre lips?
Contrasting colors in the same tonal family work best. For example, deep plum with soft mauve, or dark red with coral. This ensures a smooth gradient in your ombre lip tutorial.
Can I use just one lipstick for ombre lips?
Yes, if you blend it with a concealer or lighter shade of the same color family for the center. A monochromatic ombre is subtle but effective.
How long does it take to create ombre lips?
With practice, the whole process can take under 10 minutes. First-timers may take around 15–20 minutes following this beginner ombre tutorial.
Do ombre lips suit all skin tones?
Absolutely. The trick is choosing the right contrasting lip colors for ombre lips that complement your undertone. Warm-toned individuals should go for warm reds and oranges, and cool-toned for mauves and wines.
What mistakes should I avoid with ombre lips?
Avoid harsh unblended lines, overusing gloss, and choosing clashing colors. Always prep your lips well and blend with intention when using ombre lip products.
Is lip liner necessary for ombre lips?
It’s optional but helpful. A lip liner in your darkest shade can give clean edges and more control while blending in this easy ombre lip tutorial.
Can I create ombre lips if I have naturally dark lips?
Yes. Use concealer to neutralize your lip tone before applying lip colors. This helps the gradient show up more clearly.