How Can You Master Contouring for Your Unique Face Shape?
By understanding your face shape and applying contouring techniques specifically tailored to it. A customized contour enhances your natural bone structure, creating definition where you want it most—no one-size-fits-all needed.
TL;DR Summary
- Identify your exact face shape to tailor your contour placement.
- Use the right contouring products: cream, powder, or stick based on your skin type and makeup goals.
- Follow a step-by-step contouring routine to build precision and symmetry.
- Blending techniques make or break your look—learn seamless transitions for natural results.
- Avoid common mistakes like harsh lines and wrong undertones with expert insight.
1. Understanding Your Face Shape
Let’s begin with the foundation of great contouring—knowing your face shape. The five primary face shapes are Oval, Round, Square, Heart, and Diamond. Each has different planes, angles, and curves that affect how light and shadow enhance your features.
1.1 Oval Face Contouring Techniques
Oval faces have balanced proportions with more length than width. For face shapes contouring on oval faces, contour just beneath the cheekbones and sometimes sparingly on the hairline or jawline. The idea is to enhance without over-defining using gentle contouring techniques.
1.2 Round Face Contouring Tips
Round faces benefit from elongation through strategic contouring techniques. Apply contour in vertical lines — under cheekbones, sides of the forehead, and the jawline. Softly blend downwards to create an illusion of angles and length.
1.3 Square Face Contouring Tricks
With strong, angular features, square faces shine when you soften the jaw and temples using targeted contouring techniques. Focus contour at corners of the forehead and jaw, and slightly under the cheekbone for sculpted, balanced curves.
1.4 Heart Face Contouring Styles
A wide forehead and pointed chin make heart-shaped faces look top-heavy. Use contour along the sides of the forehead to reduce width and under cheekbones to balance the bottom half—essential face shapes contouring knowledge.
1.5 Diamond Face Contouring Secrets
Narrow foreheads and chins but wider cheekbones define this shape. Soften the cheekbone edges with contour and highlight the center of the forehead and chin to balance proportions using professional contouring techniques.
2. Choosing the Right Contour Products
Picking the right contouring products makes all the difference in application smoothness and wear time. Here’s a quick breakdown of formats:
| Type | Skin Type | Best For |
|---|---|---|
| Cream | Normal to Dry | Seamless blending and everyday wear |
| Powder | Oily or Combination | Matte finishes and layering |
| Stick | All types | Precision and travel-friendly |
Pro tip: Choose a contour shade 1–2 shades darker than your natural skin tone with the correct undertone—cool for fair/light skin, neutral or warm for medium to deep tones.
3. Step-by-Step Contouring Guide
Whether you’re a beginner or refining your routine, follow this foolproof step-by-step contouring guide:
- Start with a fresh, moisturized base. Apply a lightweight foundation or BB cream.
- Map your face shape. Lightly sketch where shadows fall based on your face shape using our face shapes contouring principles.
- Apply contour. Use a cream or stick for easy blending, powder for a matte finish.
- Apply highlight. Bring forward key areas—bridge of the nose, center of forehead, chin, under eyes.
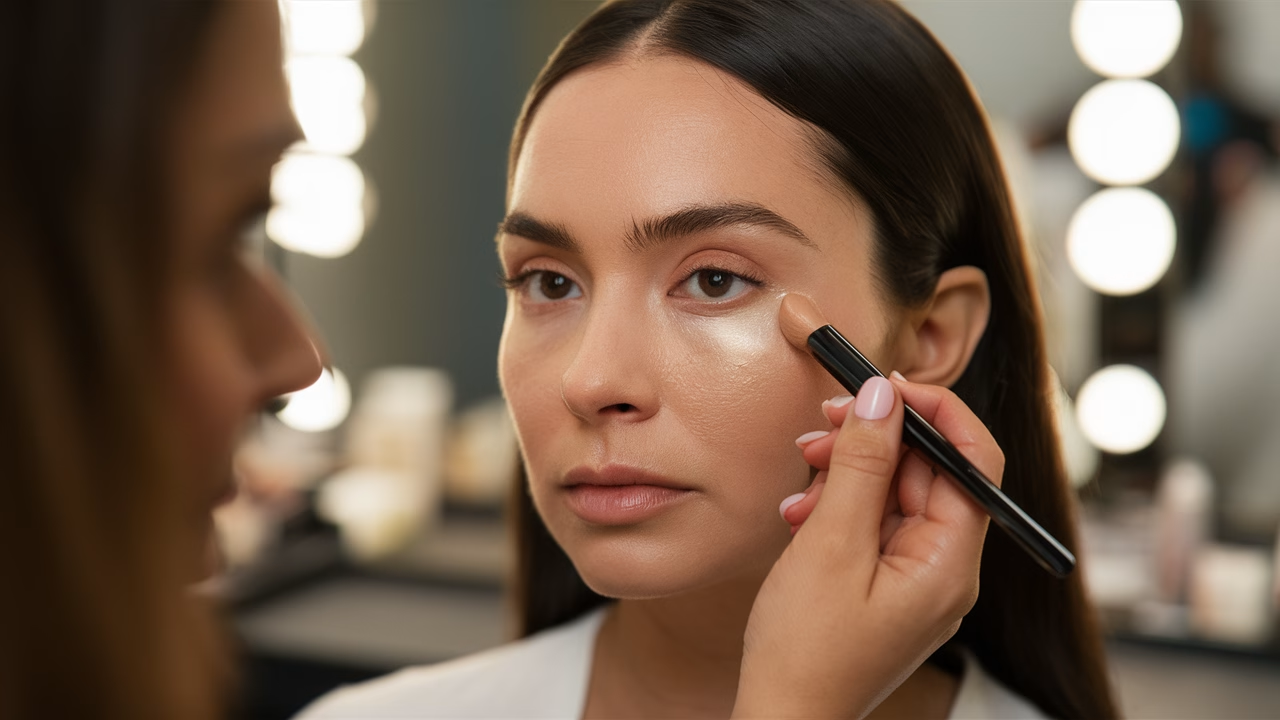
- Blend carefully. Use a damp sponge or brush with gentle dabbing motions.
- Set the look. Use a translucent powder over high points to lock in your makeup.
Remember: mastering contouring techniques is about patience and practice with your step-by-step contouring routine.
4. Blending Techniques for a Seamless Finish
This is where the blending techniques come into full play. No matter how precise your contour application is, without smooth blending, the illusion fails. Here’s a handy guide:
- Use a damp beauty sponge to press product into the skin rather than wiping it away—essential for professional blending techniques.
- Blend contours upward, especially on cheekbones, avoiding a dragging effect.
- Switch brushes/sponges between highlight and contour to prevent muddy results.
- Use translucent setting spray after blending to melt products into the skin.
Pro insight: blending allows dimension to look realistic—like natural shadow rather than makeup. These blending techniques are crucial for face shapes contouring success.
5. Expert Tips and Mistakes to Avoid
Even seasoned makeup lovers hit snags. Here’s how to dodge the common pitfalls and level up your face shapes contouring:
- Avoid harsh lines: Always soften edges through circular motions or tapping brushes with proper blending techniques.
- Don’t use shimmer in contour zones: Shadows need matte finishes to look natural.
- Simplify the routine: You don’t always need nose, jaw, and forehead contour every day in your step-by-step contouring routine.
- Test products in daylight: Undertone errors become obvious when you step outside.
Quick test: Snap a photo in both artificial and natural light. You’ll easily spot over- or under-blended spots in your contouring techniques.
Cost Guide: Contouring Product Prices in Singapore
| Category | Price Range (SGD) | Product Type |
|---|---|---|
| Low-End | $10 – $20 | Drugstore powder, cream sticks |
| Mid-Range | $25 – $45 | High-pigment palettes, dual-ended sticks |
| High-End | $50 – $100+ | Luxury kits with highlight + contour, pro palettes |
Frequently Asked Questions
1. How do I match contour shades to my skin tone?
Always choose a contour 1–2 shades darker with an undertone that complements your skin. Cool undertones pair with grey-brown contours, while warm undertones suit bronze or golden browns.
2. Is powder or cream contour better for beginners?
Cream contour blends easily and is more forgiving with mistakes, making it preferable for beginners. However, if you have oily skin, powder may suit you better.
3. How can I contour without it looking cakey?
Use thin layers, avoid overlapping cream on heavy foundation, and always blend thoroughly. A setting mist can also help products meld for a natural finish.
4. Can I contour every day?
Yes, but keep it minimal for daily looks. Focus on subtle cheekbone shading and skip full-face contouring when you’re in a rush.
5. What tools do I need for contouring like a pro?
You’ll want a damp sponge, a dense contour brush, and a fan brush for highlights. Optional tools include angled brushes and buffing brushes for custom results.
6. What’s the biggest contouring mistake?
Using the wrong undertone or placement. A universal mistake is contouring too low on the cheek, which drags the face down.
7. How do I know I’m blending enough?
If you can see a distinct line between shades, blend more. When it looks like natural shadow—faint, subtle, invisible upon close-up—you’ve nailed it.


