Why does my makeup look great indoors but wrong in natural light?
Ever walked out the door thinking your makeup was flawless, only to catch a glimpse in your car mirror and wonder what happened? We’ve all been there. The truth is, indoor lighting and yellow-toned bulbs can be deceiving, and natural light reveals every detail, especially bad blending. If your goal is to make sure your makeup looks great in natural light, mastering makeup blending techniques becomes your secret weapon.
- Unlock effortless glow: Learn to blend like a pro and avoid common makeup issues.
- Fix bad blending: Simple fixes to make your application flawless outside.
- Master transitions: Seamless shift from room light to sunlight.
- Real-life tested: Practical, easy-to-follow natural light makeup tips.
Why Blending is Key for Natural Light Makeup
Think of your face as a canvas and makeup blending as the art of making brushstrokes invisible. In photography, harsh lines are retouched for a natural finish. In makeup? It’s up to your hands, tools, and techniques to ensure your look is cohesive, no matter the lighting. When you fix bad blending, you create that seamless makeup transition that looks flawless indoors and out.
Common Makeup Blending Mistakes

Let’s get real about makeup blending mistakes that happen to everyone, even seasoned artists. Here are the usual suspects you can spot and solve fast:
- Line of demarcation: That unsightly line between your jaw and neck is a sure giveaway.
- Patches or streaks: Caused by dry skin or uneven foundation mixing.
- Harsh contour or bronzer edges: Looks more like war paint under the sun.
- Unblended eyeshadow: Color blocks instead of seamless gradients.
Each of these bad blending issues becomes ten times more obvious when sunlight hits your face. The goal? Soft, seamless makeup transition of shades, from base to brows.
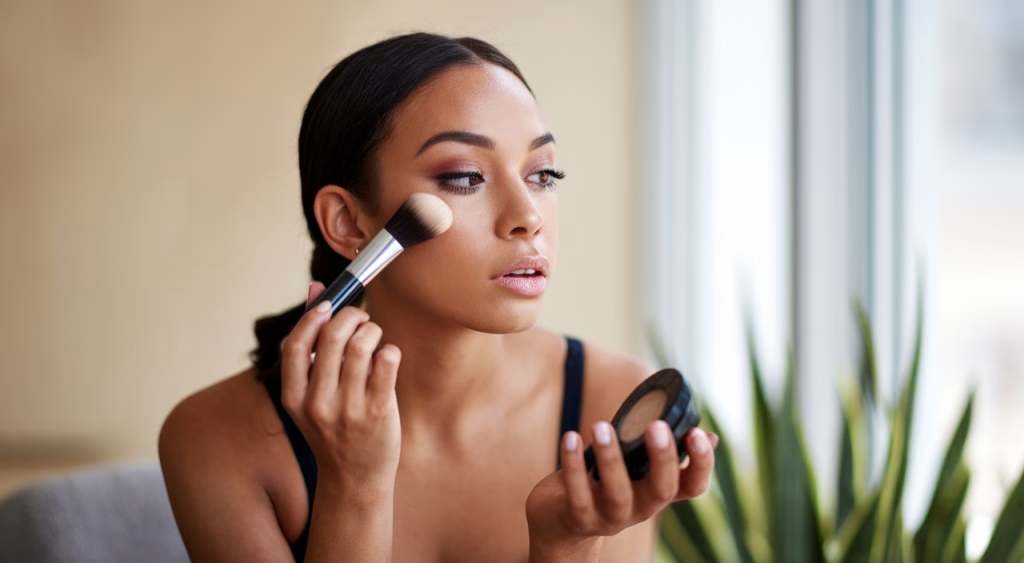
Tools and Techniques for Seamless Blending
Just like a painter chooses brushes carefully, your makeup blending tools must suit your product and technique. Here’s what you need to know:
| Tool | Best for | Technique Tip |
|---|---|---|
| Beauty Sponge | Foundation, concealer | Use damp for a more natural, sheer build |
| Fluffy Powder Brush | Setting powder, bronzer | Swirl in circular motions to diffuse product |
| Flat Eyeshadow Brush | Packing pigment | Tap, don’t drag, for richer color |
| Blending Eye Brush | Transition shades | Use windshield-wiper motions |
The takeaway? Clean tools and the right material make or break your makeup blending game.
Tips for Transitioning Makeup into Natural Light
Your bathroom lighting lied to you? Don’t worry! Here’s how to create a seamless makeup transition from spotlights to sunlight by fixing bad blending before you step outside.
Correcting Bad Blending Issues

Here’s a trick we recommend to all our clients – always keep a face-length mirror near a window. Natural light is your final judge, and it can save your look. Let’s troubleshoot some common bad blending issues:
- Uneven foundation blend: Use a damp sponge to pat and press – never wipe – into areas like the nose and jaw.
- Patchy contour: Take a clean brush and blend upward in small circular motions to diffuse any harsh lines.
- Eyeshadow line too defined: Grab a neutral transition shade to wipe out the edge and re-blend.
- Neck mismatch: Use a bronzer to softly blend your jaw into your neck for a seamless makeup transition.
You can even use a misting spray over the entire face to reset powder layers before re-blending them into each other. Think of it as rehydrating the canvas for better makeup blending.
Enhancing Your Natural Light Makeup Look
Now that your bad blending is sorted, let’s enhance your natural light makeup further. Natural light isn’t just an honesty test – it’s your best highlighter when you know these natural light makeup tips:
- Use cream-based products: They reflect light and create a skin-like finish. Think cream blush, stick highlighter, contour balms.
- Less is more: Natural light reveals excess makeup. Opt for thin, layered applications.
- Reflective placement: Strategic glow on top of cheekbones, brow bone, and Cupid’s bow.
- Matte-smart finishes: Use matte only where you get oily – usually T-zone – not all over the face.
Cost Guide: Investing in Quality Blending Tools
High-quality blending tools can make all the difference, but they don’t have to bankrupt your makeup bag. Here’s what to expect:
| Category | Price Range |
|---|---|
| Blending Sponges | $5 – $25 |
| Blending Brush Sets | $15 – $60+ |
| Individual Eyeshadow Brushes | $3 – $25 |
| Cream products (for natural finish) | $10 – $50 |
Quality matters, but proper makeup blending techniques matter even more. Don’t obsess over price tags. Prioritize brush density, comfort, and longevity.
Final Thoughts: Makeup That Moves with the Light
Perfect makeup blending isn’t about quantity – it’s about quality. The best compliments you’ll get won’t be about your contour or eyeshadow color. They’ll be about how your makeup looks like skin, like you, even in harsh sunlight. When you’re confident that your makeup looks great in natural light through seamless makeup transition techniques, that’s when your artistry truly begins to shine.
Frequently Asked Questions
- How can I tell if my makeup is blended well for natural light?
Step near an open window or use your phone’s front camera outdoors. If there are no harsh lines or patchy spots, you’re golden. - What’s the best way to avoid makeup issues caused by bad indoor lighting?
Always do a final check with a handheld mirror in natural light or invest in a makeup mirror that simulates daylight. - Can I fix bad blending without starting over?
Absolutely. A clean brush or damp sponge can help you rework sections without wiping the whole thing away. - Why does my makeup oxidize in natural light?
It could be due to ingredients reacting with your skin oils or air. Use a primer and set your foundation properly. - Should I apply products differently if I know I’ll be in natural light?
Yes. Opt for creams, sheer formulas, and build in thin layers to avoid cakiness and enhance believability.